
Ready to get started with your home manicures? There are a few things you’ll need to know first to make sure that you get the best results for you and your nails! We’ll teach you how to apply gel polish at home, tips on how to store gel polish, and make sure that you know how to prevent chipping and peeling for long-lasting manicures.
If you are completely new to gel nails, our Bluesky Gel Nail Starter Kit includes everything you need in one box — UV/LED lamp, base coat, top coat, three gel polish colours, cleanser wipes and prep tools. It is the fastest way to get set up.
How to prepare your nails for a manicure
Before you get started, make sure you properly prepare your nails with your nail preparation tools. Too many people skip over this and head straight to the fun part. But by ignoring prep, you are likely to have underprepared nails, meaning your gel manicure won’t last.
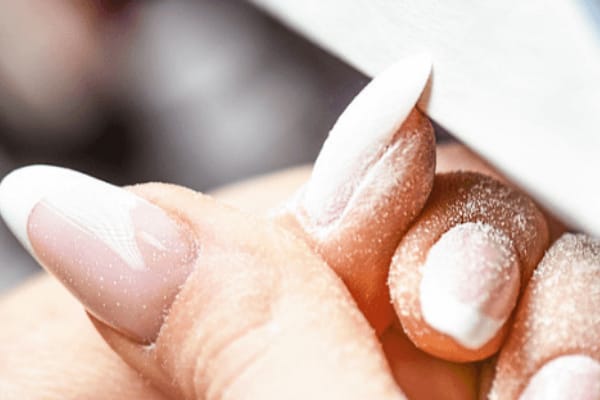
Gently push down your cuticles and file your nails to the shape you desire. Then, most importantly, buff over your nails to remove the shine. This helps the gel polish adhere to your nails – without this step, the gel is likely to peel off straight away.
Wipe your nails with Cleanser Wipes or Cleanser and Lint Free Wipes and ensure that all dust and debris have been removed from your nails and skin. Now, you’re ready to begin!
How to apply gel polish
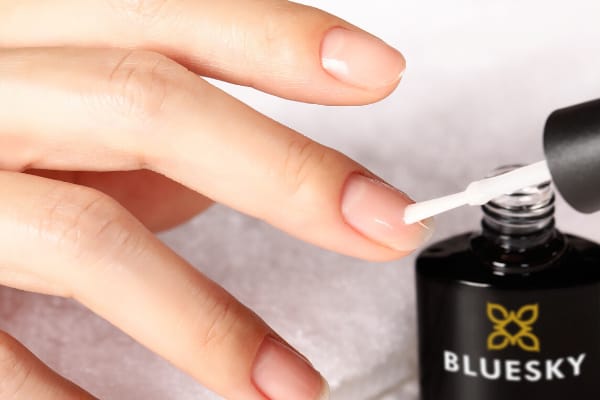
Use a Base Coat – always start with a Base Coat. This is so the gel will adhere to (stick to) your nail – forget the base, and your gel manicure won’t go to plan!
Apply using thin layers – each coat MUST be applied using a thin coat. Too thick, and the gel won’t cure properly and you’ll end up with lumpy, bubbled gel polish. This is so important as the gel needs a full and proper cure, and your Nail Lamp will not be able to properly cure gel polish that has been applied too thick. You can then build up the colour using your thin coats until you’re happy. We recommend 2-3 coats, depending on the opacity you're looking for.
Avoid your skin and cuticle – we can’t stress enough how important this step is! Make sure you avoid your skin and cuticle when applying gel. It is not advisable to get gel on your skin, so avoid this where possible. If you do get any on your skin, simply wipe it away with cleanser before curing. Gel polish is NOT nail polish – it will not simply peel off once cured/dried. It will stay on your skin, and most likely cause the rest of the gel on your nail to peel off too.
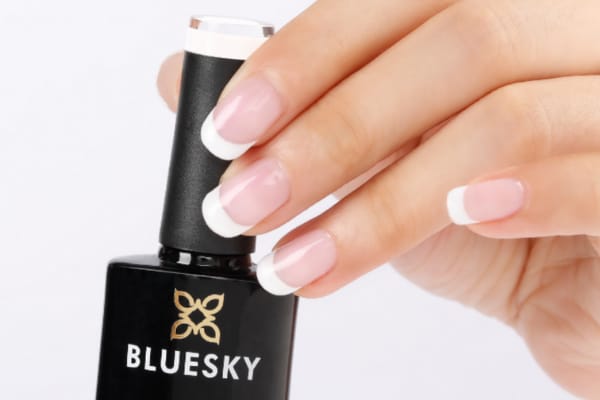
Always cap the free edge – the most important step when applying gel, and one many forget, is to always make sure you cap the tip of your nail. This acts as a seal for the gel, helping it to stick to your nail to ensure it doesn’t chip or peel off. Simply run over the tip of your nail with your brush to seal it before curing. You may want to hold your skin back to expose more of the tip of the nail if you have short nails, as you'll find it easier to cap the free edge and avoid getting gel on your skin this way.
Cure each coat properly – always ensure your hand is flat under your lamp and you are curing for the right amount of time - this is 60 seconds in your Bluesky UV/LED lamp for each coat. If you find your gel is not curing, you may have applied the gel too thick. Cure for longer if this is the case. It can also be the case that your lamp isn’t functioning properly. Turn it upside down to check that the bulbs are working, and if you have a very old Nail Lamp, it may be time to replace it.
How to store your gel polish
How your store your gel products is very important. When exposed to even a small amount of UV light, gel will begin to cure in the bottle, which will often render the product unusable. If your gel has become lumpy, has made the brush hard or has started to become crystalised/has little bits in the gel, it means it has started to cure in the bottle.
Make sure all your gel products are stored away from direct sunlight and any warm temperatures. Especially avoid doing your nails outside, or next to a window!
Also make sure you keep all your gel products away from your nail lamp when curing is in progress. This is because the LED/UV light emitted from your lamp can start the curing process, so we advise making sure your products aren’t ever kept next to your lamp.
If you’ve just received your Bluesky order but you’re not ready to use it yet, do make sure that you are adequately storing all your products safely upon arrival.
How to remove gel polish
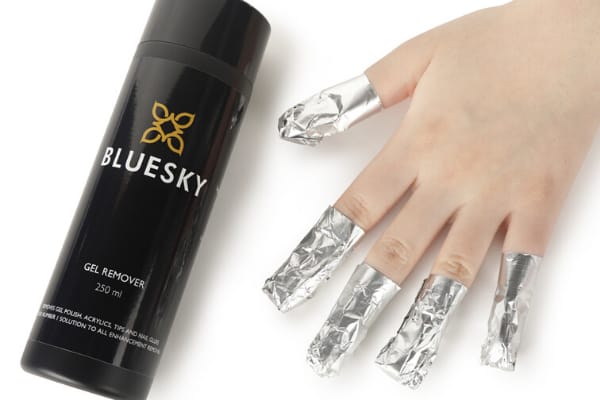
Removing gel polish safely is key. That means no picking or peeling your gel off, as this will undoubtedly ruin your lovely nails! When removing any gel products, you will need our Gel Polish Removal products — either our acetone remover or our pre-soaked Remover Wraps.
Both work in the same way, you will just need foils and cotton pads or lint free wipes to use alongside our acetone remover. With the wraps, you have everything you need to remove the gel all in one product.
When removing gel polish, make sure you buff the shine off the nail first, and use a nail file on the tip of your nail to remove the seal. This will make sure the remover can penetrate the gel and soak it off.
You will then need to wrap your nails in acetone or soak them in a bowl filled with acetone — we have a step by step guide for gel polish removal to take you through the whole process in more detail.
Quickfire FAQs: Our most frequently asked questions and answers to help YOU out!
My gel polish is lifting and peeling, why is this?
Follow our guidance for proper preparation and application as above. If you have followed them step by step and you are still experiencing peeling, it may be that you have oily nail beds. This can easily be fixed by adding a primer to your prep routine. Simply apply our Bluesky Primer before your Base Coat, air dry for 60 seconds, and continue with your manicure. This will help to remove any lasting oils from your nail plate, which can be a common cause for gel polish lifting.
Also, be sure to look at your daily routine. Do you work in a hands-on, manual job? Or perhaps you are continuously washing your hands or working with products? This can all result in the longevity of your gel manicure being shortened. Make sure you’re doing all you can to protect your nails, including wearing gloves where possible for daily tasks and avoid soaking them in hot water for long periods of time, such as when you have a bath.
Do I need to use a primer?
Primer is a product for people who struggle with lifting and peeling. If you have no issues with your gel manicure lasting around two weeks, then you don't need to use a primer.
How long should my gel manicure last?
With proper prep, application and aftercare, your manicure can last anywhere between 2-3 weeks. Between your gel manicures, we recommend applying Cuticle Oil daily to help keep your nails hydrated, healthy and growing strong so that they're ready when you next want to give yourself a manicure!
Why won’t my gel polish cure?
There are two main reasons why your gel polish isn’t curing. The main reason is that you have applied the gel too thick and the lamp hasn’t been able to cure it. Make sure each coat you apply is thin so that your lamp can easily cure it in the correct amount of time. It may also be that your lamp needs replacing if it is old. Ensure you check the bulbs in your lamp to check for any broken bulbs, as this will decrease the power of your lamp and thus its ability to cure gel products.
Why is my gel polish lumpy? Why is my gel polish still wet? Why is my gel polish wrinkly?
See above! If your gel polish is wet (not tacky, it is supposed to be tacky), lumpy, or wrinkly after curing, it means that you have applied it too thickly and not cured it thoroughly. If you then apply a second coat without properly curing the first, it will start to go wrinkly and bubbly due to it still being wet. Ensure each coat is cured properly before moving on to the next.
My gel polish is tacky, is this normal?
Yes, your gel will be slightly tacky to the touch after you have cured each coat. This is so that the next coat can properly adhere to the previous one. Once you have applied your Top Coat, you will need to wipe with cleanser to remove the tacky layer to finish your manicure. You can also use a No Wipe Top Coat, which will leave no sticky residue behind.
Do I need to wipe with cleanser after every coat?
No! You only need to remove the tacky layer with cleanser after you have cured your Top Coat. You don’t need to use cleanser after applying every coat. This will remove the tacky layer and make it harder for your next coat to adhere to it.
Always remember the key rules when using gel products: proper prep, proper application, proper aftercare – and that goes for the care and storage of your products too. If you follow the above, you will soon turn from a gel polish beginner into a real at-home manicure pro!
Bluesky
Hi Joann, so great to hear you love our polishes! Our lamp is an LED/UV lamp so is long-lasting, and we also offer a 12 month warranty with every purchase of a Bluesky lamp. We must however advise that our lamp is for home-use only, and has not been developed for professional salon use.
Joann Whitehouse
Hi I’m interested in your lamp as I love your polishes but approx how long can the lamp be used before replacing as my existing lamp has an indicator on it when the bulbs need changing
Thank you
Smc
Greats tips guys 👏🏻👏🏻
Patricia
Great information , thank you for all the tips and how tos for a great mani!
Stephanie
Great advice.. can’t wait to try the colour changing gel.