You’ve got your Bluesky Starter Kit. You’ve been getting confident with your at-home gel manicures and having plenty of practice. And now you want to up your game a little – but where to start?
Nail art may seem something that’s out of reach, but so many of our Bluesky home users have found that with a little more practice – and a few hints and tips – they’ve been able to create stunning nail designs from the comfort of their own home!
Here are our favourite hacks for getting started with nail art and our top products you’ll need to add to your Bluesky collection.
Step 1: Nail Art Tools You Need
First, get your tools! Having a set of nail art brushes is the best place to start to help you create a variety of different designs. Our nail art brush set contains five different sized brushes to ensure you can create anything from ombre to thin patterns and lines.
Cleanser Wipes are also great to have on hand to clean up any little spills or for quickly wiping your brush before using a new colour.
The good thing about nail art is that you don’t always need tools, either. Some great designs can be created just using your gel polish kit – and we’re going to take you through some of our favourites.
Step 2: Try Some Simple Nail Art Designs
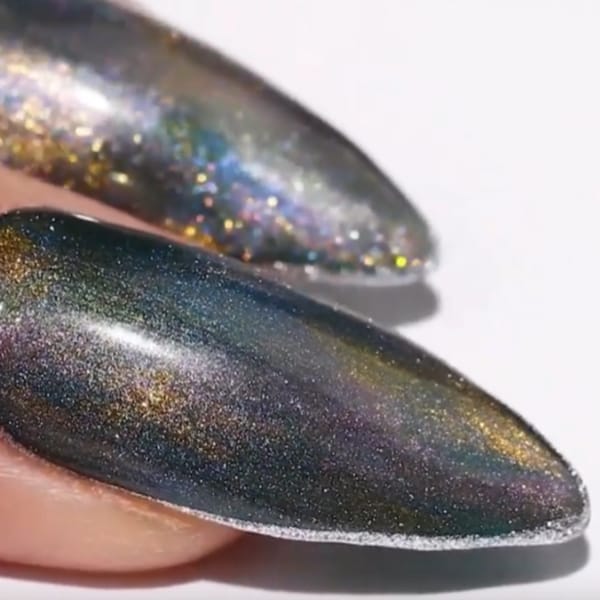
A great starting place for nail art is one that you don’t even need to use a brush for! Our Cat Eye Coat helps you create a super simple style with minimal effort required – perfect for nail art beginners.

How To Create Cat Eye Nails
- Start by applying your Bluesky Base Coat and curing for 60 seconds LED/2 minutes UV.
- Apply 2 coats of black gel polish, curing for 60 seconds LED/2 minutes UV after each application.
- Now, apply your chosen colour Cat Eye Coat – before curing, hold your Cat Eye Magnet over your nail, slowly moving the magnet around.
- Cure for 60 seconds LED/2 minutes UV and you will now have Cat Eye nails!
- Repeat for all nails then finish with a Bluesky Top Coat, with a final 60 second/2 minute cure. Wipe over nails with a Cleanser Wipe for a high-shine finish.
Ready to step it up a gear? Ombre is a great nail art design to master if you’re looking to create one of the top nail trends from home! Here are two of our favourite ways to create it, starting with the classic colour blend ombre:
How To Create Ombre Nails
- Start as normal with your Bluesky Base Coat and cure for 60 seconds LED/2 minutes UV.
- Choose your two gel polish colours, and apply one colour to the bottom half of your nail and the other colour to the top half, leaving a thin gap in between them.
- Take a nail art brush and blend the two colours together by stroking your brush across the nail.
- Once your colours have started to blend together, cure for 60 seconds LED/2 minutes UV.
- Repeat steps 2 and 3 again to build up the colour. Repeat a further time if you would like a more opaque finish.
- Once happy with your ombre design, and you’ve repeated the process for all nails, finish with a Bluesky Top Coat (glossy works best for the ombre look) and cure for 60 seconds LED/2 minutes UV before wiping with a Cleanser Wipe for the ultimate shine!
And if you’re looking for a more simple style – including a little sparkle – this ombre glitter tutorial will be perfect for you:
How To Create Gradient Glitter Nails
- Start with your Bluesky Base Coat and cure for 60 seconds LED/2 minutes UV.
- Apply your chosen colour coat as normal, curing for 60 seconds LED/2 minutes UV after each coat is applied.
- Take your glitter gel polish and, starting from either the bottom or the tip of your nail (depending on which way you'd like the ombre to go), apply a small amount of gel polish – you’ll want it to be slightly thicker than usual, as you’ll be using this to create the gradient effect.
- Next, slowly drag the glitter down (or up) your nail, so that you have more glitter at the starting point and less and less as you work your way in the opposite direction.
- Tip: You may find it easier to do small dots of gel polish as opposed to dragging it down – whichever technique you find works best for you!
- Once happy with your finished look, cure for 60 seconds LED/2 minutes UV. You may want to repeat the process to add more glitter for your desired look.
- Repeat for all nails you’d like the ombre effect on, and finish with a glossy Top Coat (curing for 60 seconds LED/2 minutes UV) and finishing by wiping with a Cleanser Wipe.
Step 3: Remember To Keep Your Tools Clean!
Your nail art brushes and tools are important to ensure your designs look the part!
For more nail art tutorials, especially some more intermediate and advanced techniques, you can visit our YouTube channel. Not sure which colours to choose? Take a look at our top 100 gel polish colours!
Looking to expand your gel collection? Take advantage of our Mix & Match offer:
Mix & Match Gels:
Buy 6-11 and SAVE 15% / Buy 12+ and SAVE 20%


Bluesky
Hi Karen :) As long as you haven’t cured it first, you will be able to use a nail art brush dipped in a small amount of cleanser to tidy up your design!
Karen Belcher
Hi I have your gel nail vanish and love it xx going to try and do the art but if I go wrong what can I take the pattern off without having to take whole lot off xx